Wanted to share this as i did my setup a little different than i've seen thus far(Think everybody's setup is a little unique at least). This is in no way meant to be a "how-to" or writeup as it's been overdone already . . . just putting it out their in case someone attempting install wants to replicate the setup. I recommend reading all the How-to's to get familiar with all the different mounting/routing options.
Jimi-Jak thread (this is actually his can i purchased used,thanks JJ!)
http://www.ecoboostperformanceforum.com/index.php/topic,2536.0.html
MiWiAu thread -This was a great solution for a vacuum source without drilling,just use BOV with PCV elbow. Also provides a handy diagram for transverse applications.I followed it directly
http://www.ecoboostperformanceforum.com/index.php/topic,6716.0.html
Glock-coma also had a nice install of a monster can on driver's side fender on a SHO (reference Jim-Jak's thread post #75). This option was in my back pocket if the pass. side didn't work out.
To re-iterate i installed the STANDARD can in the passenger side and it was tight, no way a monster can would fit in the spot i put mine.
Anyway, thanks to all the members who posted info about this OCC-it was extremely helpful!
Goals for my install:
Mount can in passenger side front bumper-I wanted as little hose running around the car as possible and majority of the OEM fittings are pass. side so this made sense to me.
Keep an option to remove the RX Clean side separator/oil cap and replace OEM oil cap and clean side line for dealer visits.
As little drilling as possible- mainly i didn't want to drill the rear turbo charge pipe. I was ok doing the airbox but still made efforts to make that discreet and retain an OEM look when i remove the barb fitting and have the factory clean side fittings on to take it in for warranty work.
Find a convenient drain location and easy to use(as in i can drain it without raising the car) valve that wasn't bulky or heavy. I didn't want to use the big heavy copper valves i had seen used before and the location didn't provide a lot of clearance for fittings/adapters etc. I was very happy with how the drain setup worked out.
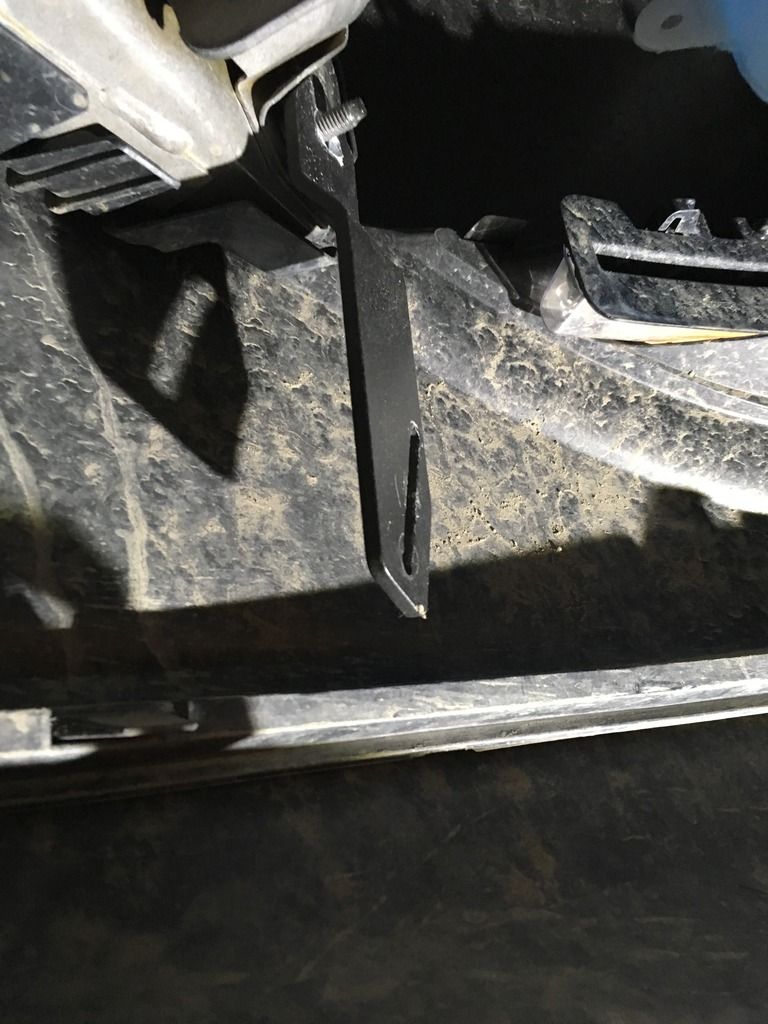
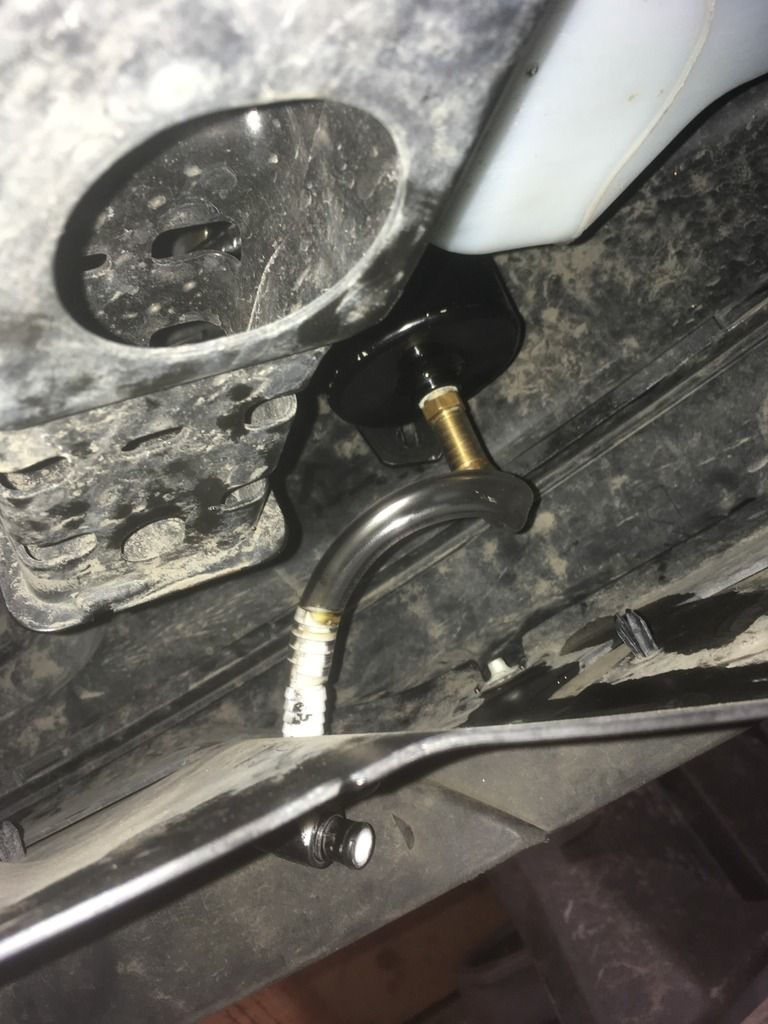
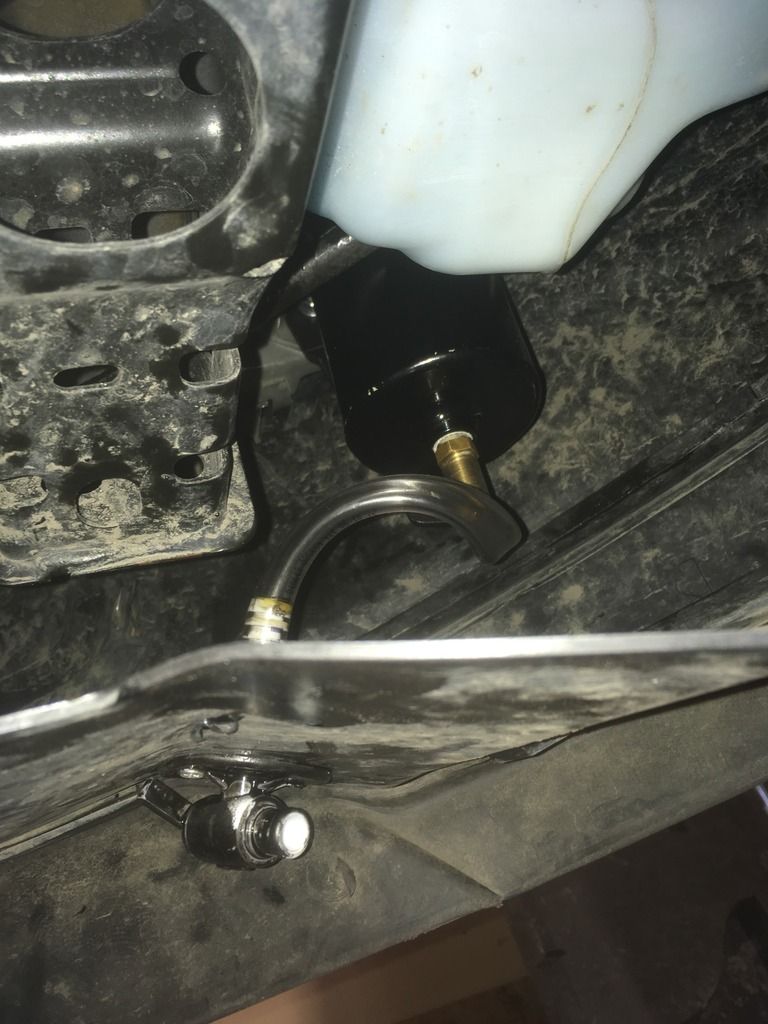
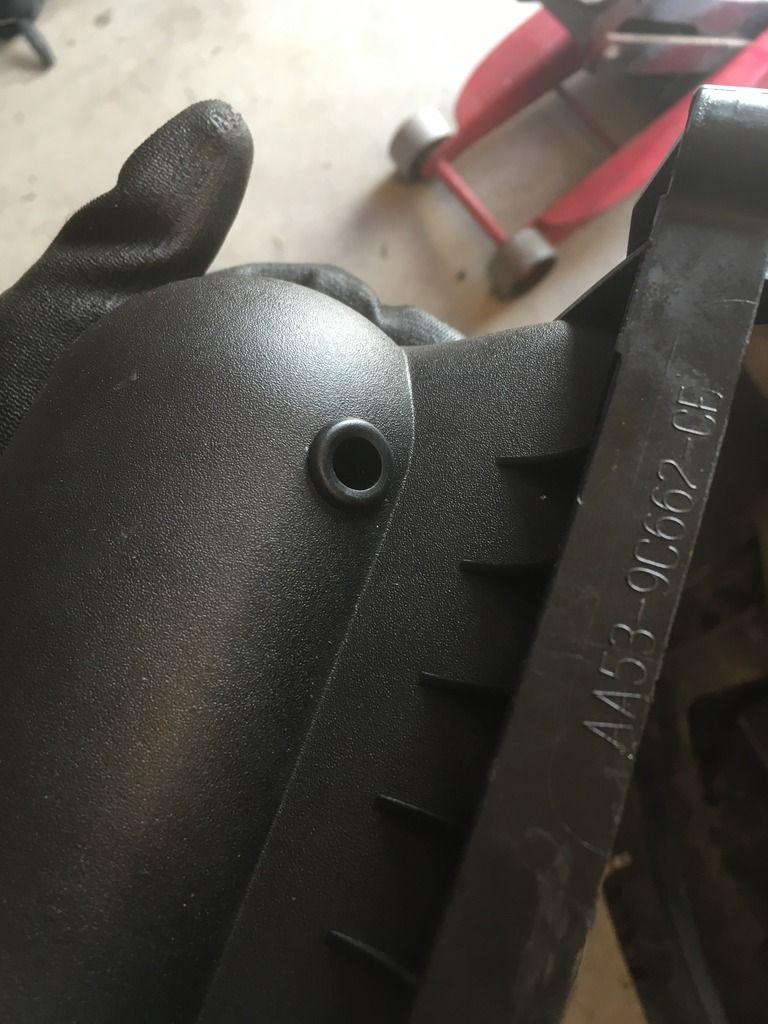
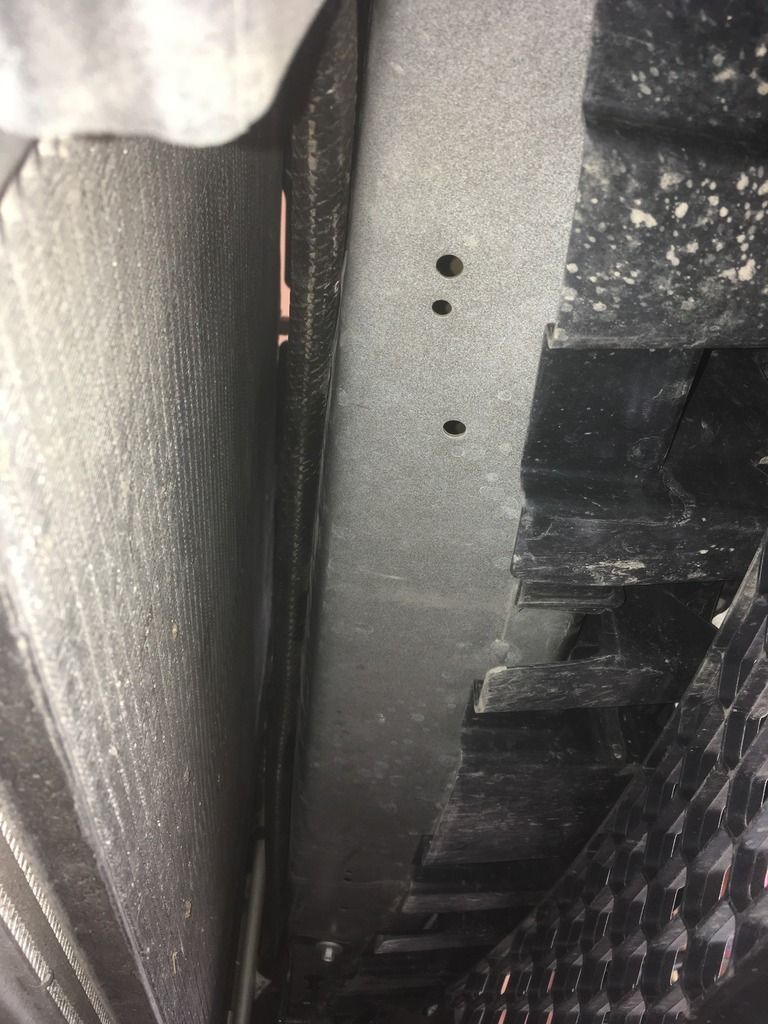
1st location fitting- Found this existing bolt on the front bumper support. I had to ream out the bracket hole just a bit to get it to fully seat against the bumper stud and also had to drill a new hole in the RX bracket(above the sliding section) to get the can positioned just the way i wanted. Overall finding the location was pretty easy. This pic is before i drilled the additional hole for the can
Installed with 8mm nut
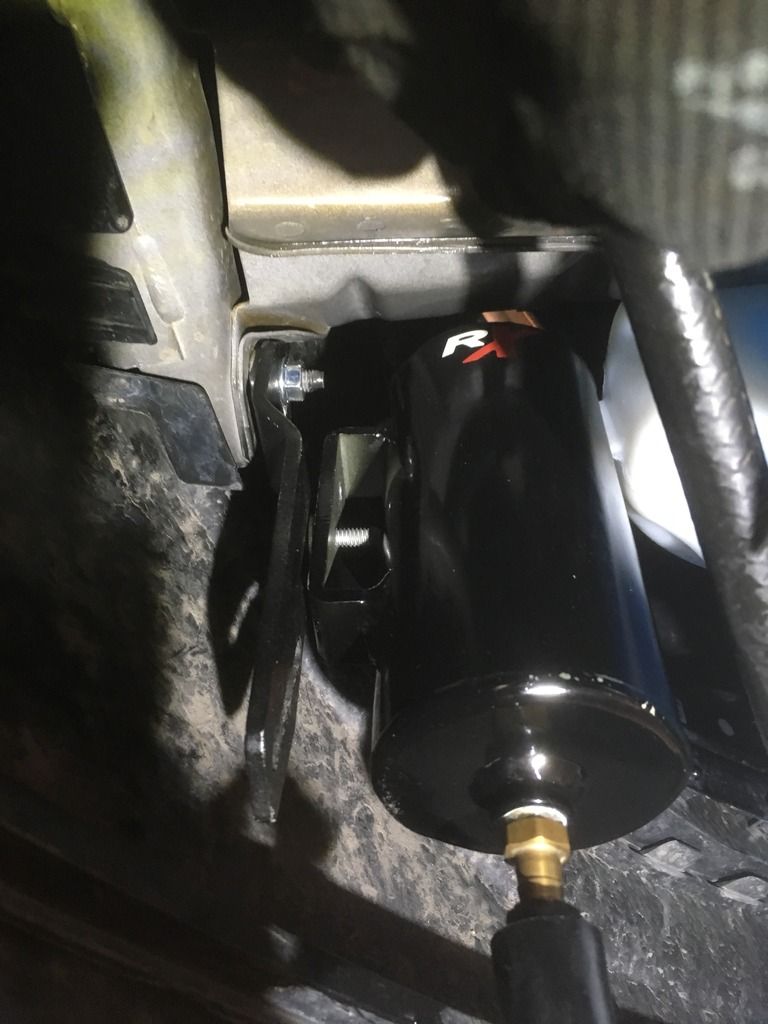
Ended up cutting a small triangular tab from the washer res. it was rubbing up on the can just a little.You can barely see the nub from it in this pic towards the top of the can
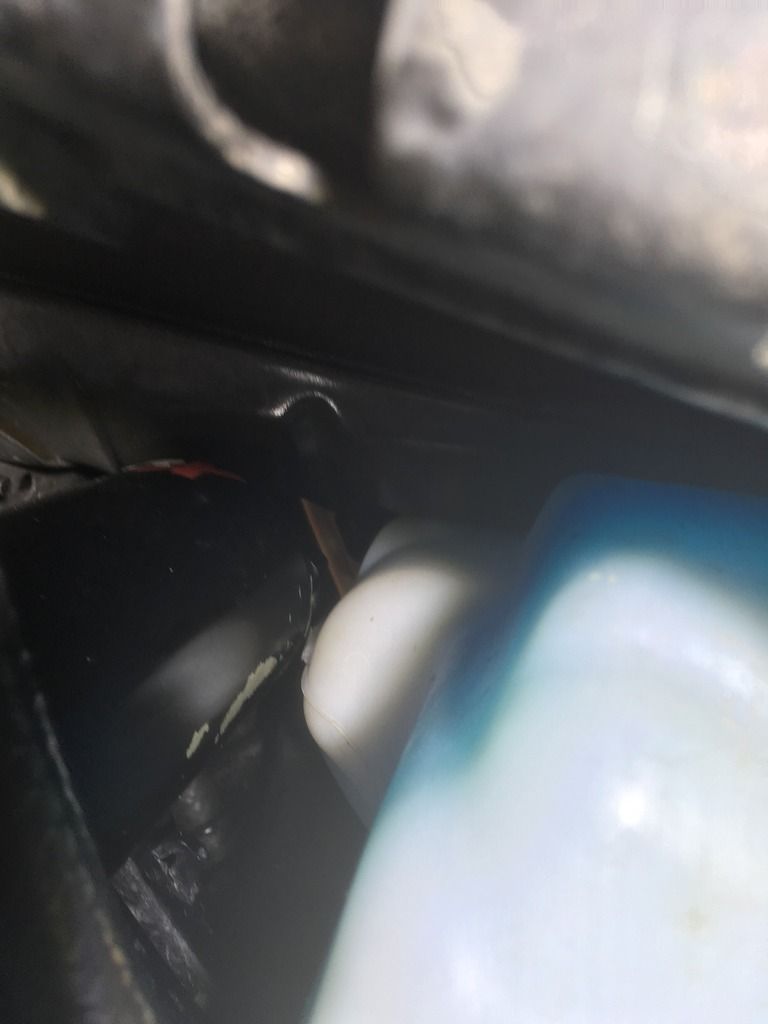
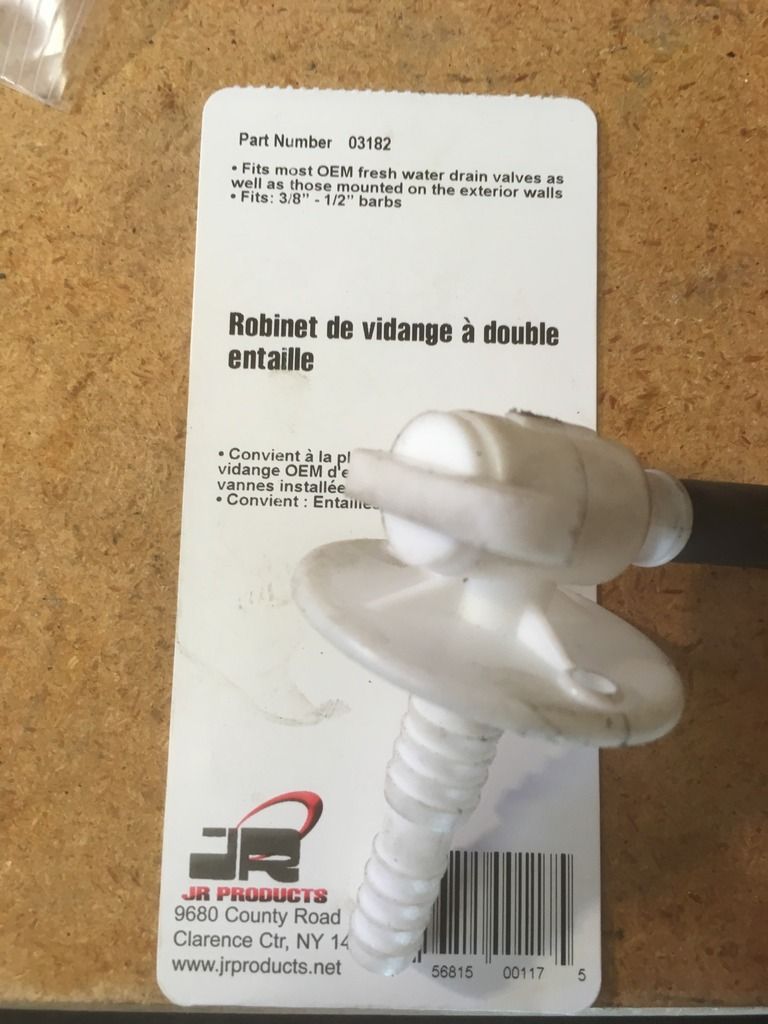
Next was figuring out the drain setup. I used this barbed drain fitting i got from an RV store in town. I was stoked to find this thing in town! it worked flawlessly.Just hoping it stays out of harms way whe i'm driving around in a foot of snow.
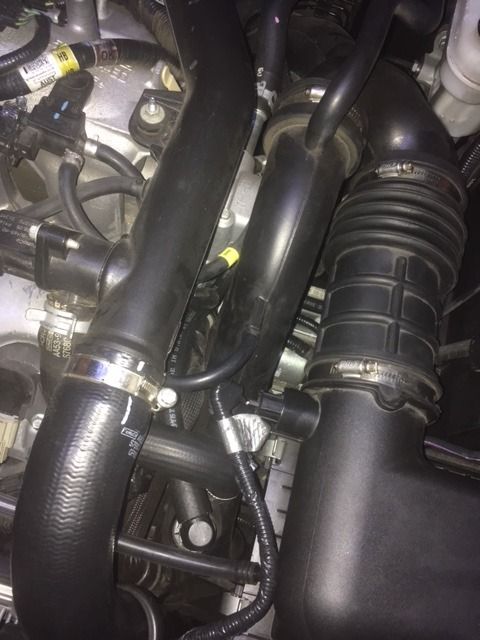
On to drilling the airbox for CSS hose.I used a 3/8" barb fitting with 3/8" grommet instead of threaded fitting provided in the kit. Just looked a little cleaner than a threaded/barb fitting
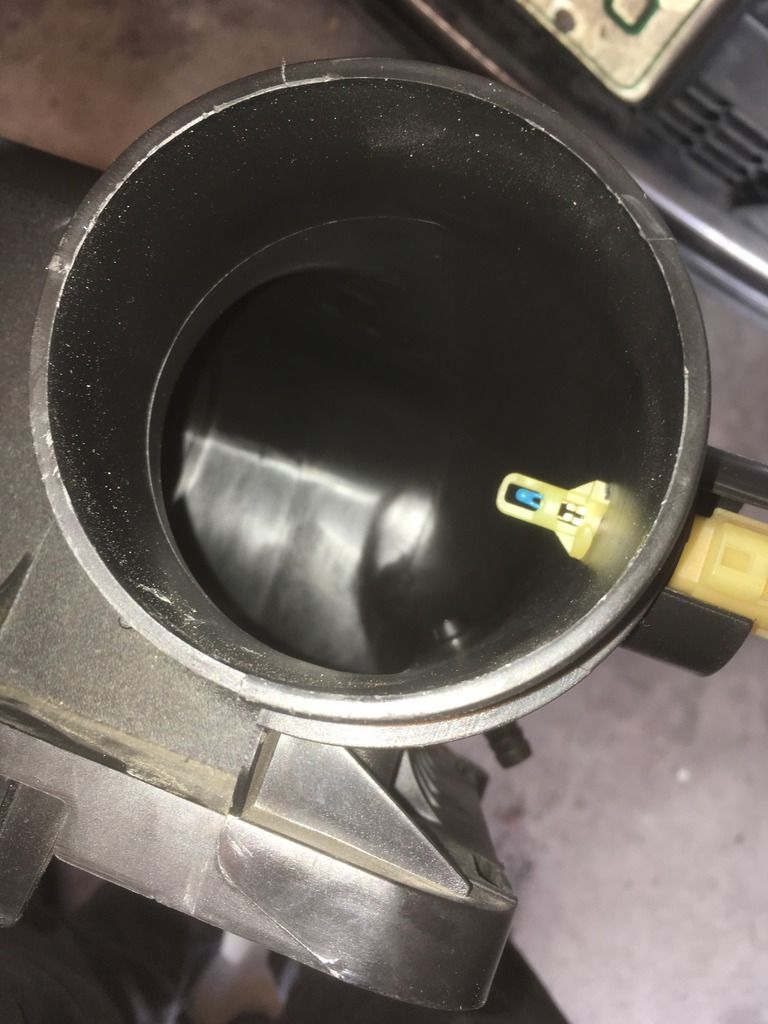
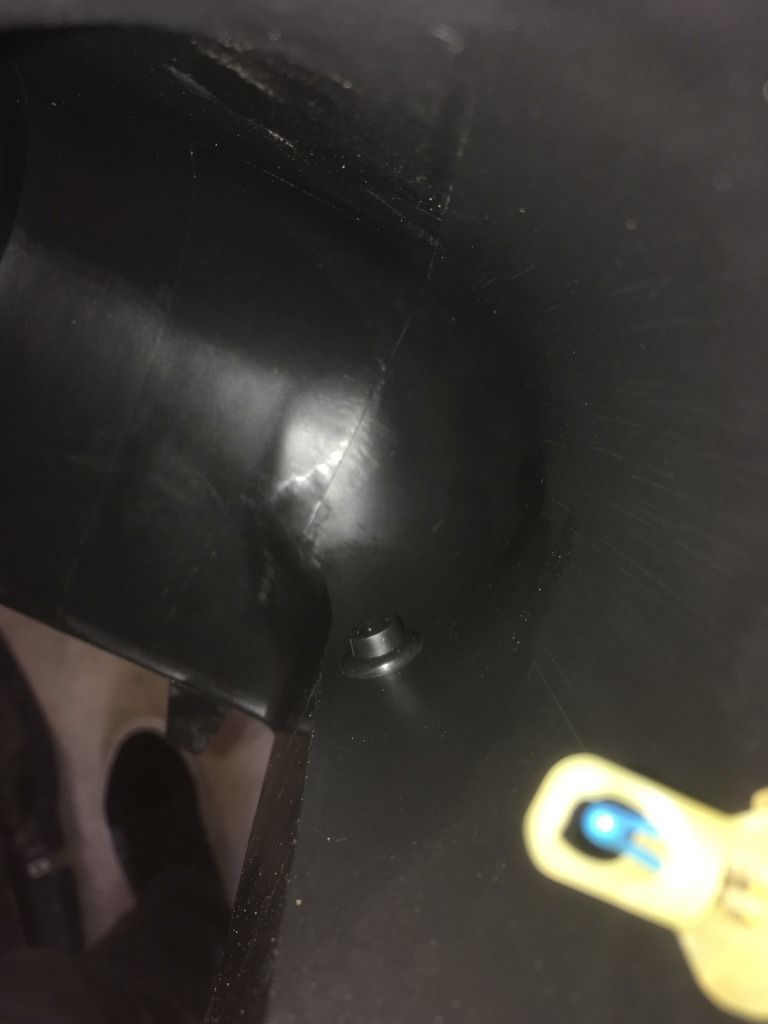
Can't see it from the top when installed without the barb
Then just routing the lines from can according to the diagram.
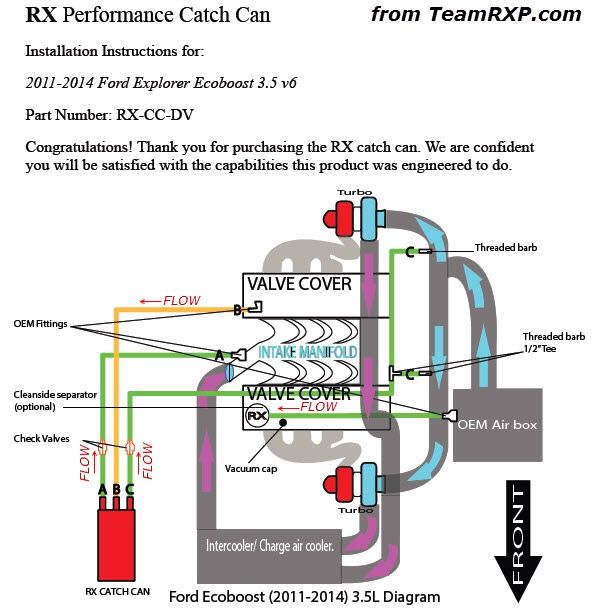
From OEM ports down to can
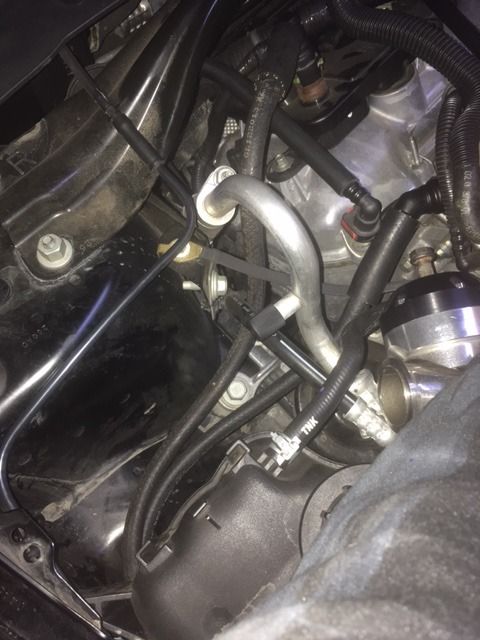
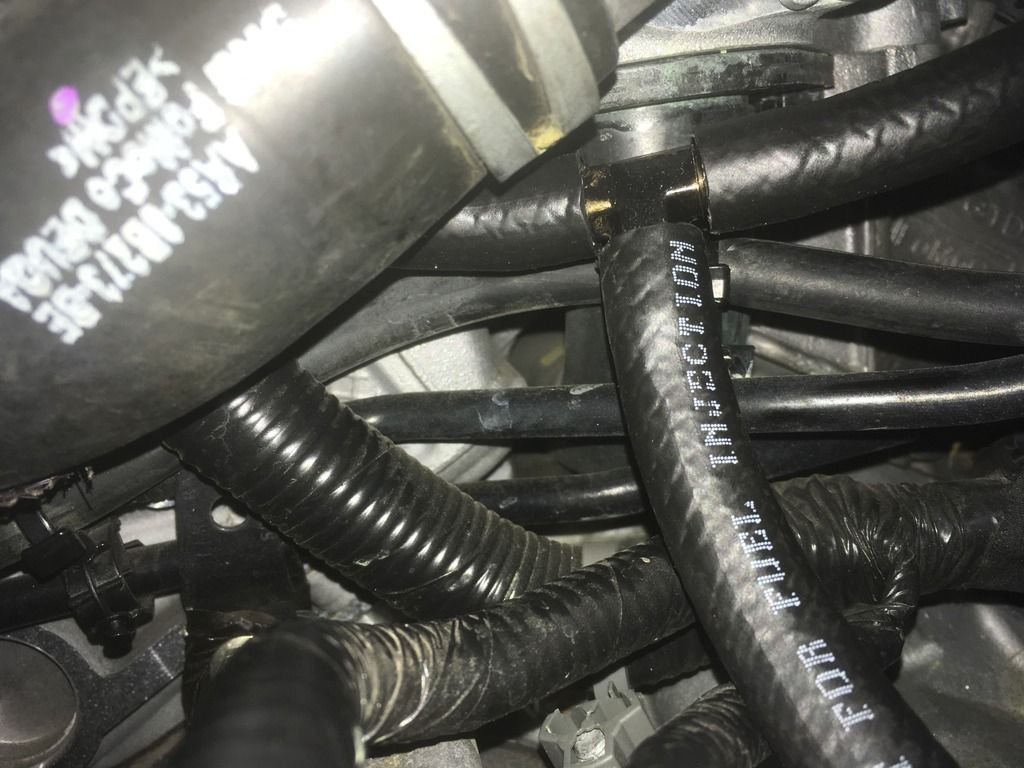
And single hose for charge pipes over to driver side T fitting
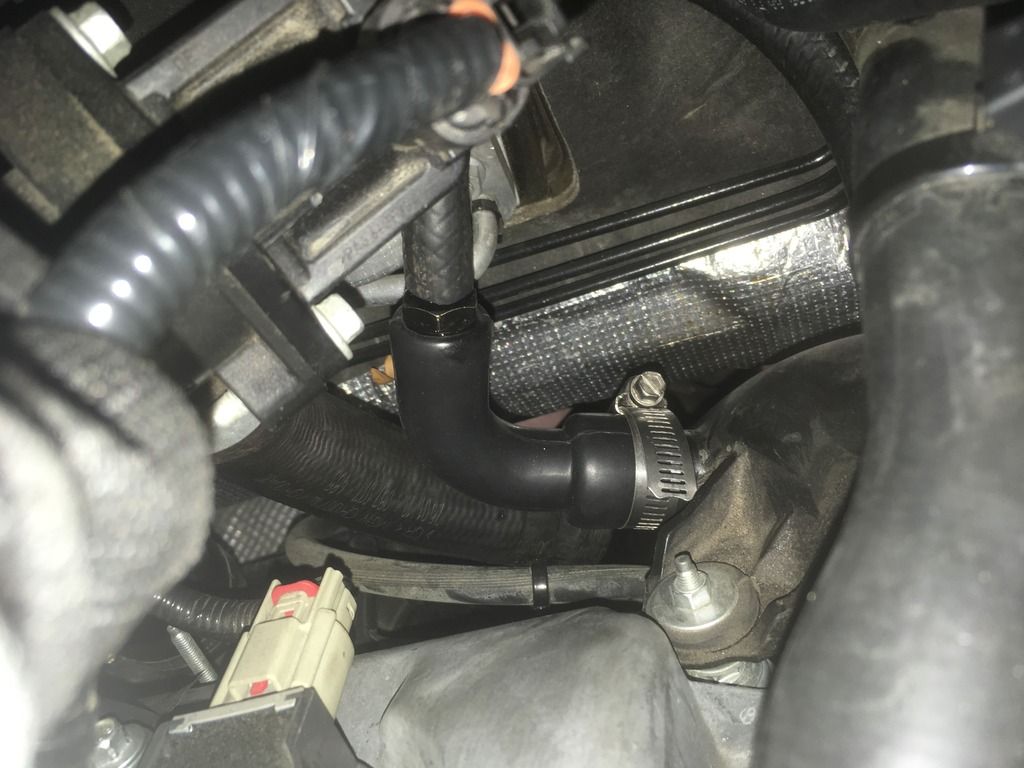
T fitting under T stat housing. I will cap off the front fitting when i want to re-install the factory Clean side tube and oil cap.
and rear BOV connection up to T
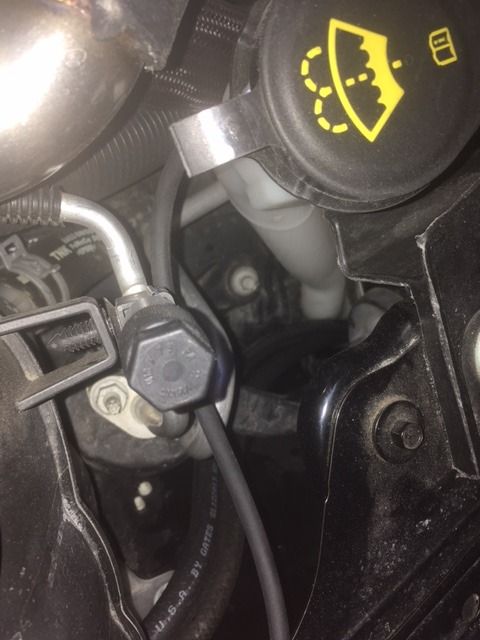
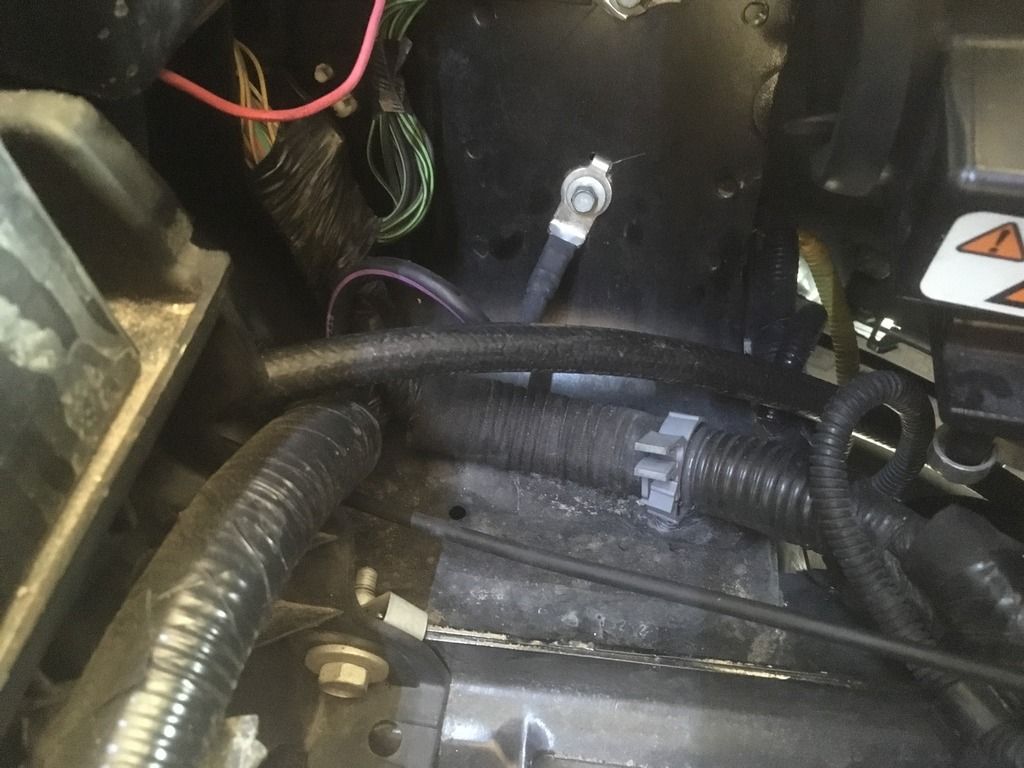
Then front OEM fitting for 2nd vacuum source under boost
And link with more pics
http://s749.photobucket.com/user/04nutzer/slideshow/
That's all i got! After running around and getting all the parts and fittings the install really didn't take long. Happy my big assed b*tch is breathin a little better now!
Jimi-Jak thread (this is actually his can i purchased used,thanks JJ!)
http://www.ecoboostperformanceforum.com/index.php/topic,2536.0.html
MiWiAu thread -This was a great solution for a vacuum source without drilling,just use BOV with PCV elbow. Also provides a handy diagram for transverse applications.I followed it directly
http://www.ecoboostperformanceforum.com/index.php/topic,6716.0.html
Glock-coma also had a nice install of a monster can on driver's side fender on a SHO (reference Jim-Jak's thread post #75). This option was in my back pocket if the pass. side didn't work out.
To re-iterate i installed the STANDARD can in the passenger side and it was tight, no way a monster can would fit in the spot i put mine.
Anyway, thanks to all the members who posted info about this OCC-it was extremely helpful!
Goals for my install:
Mount can in passenger side front bumper-I wanted as little hose running around the car as possible and majority of the OEM fittings are pass. side so this made sense to me.
Keep an option to remove the RX Clean side separator/oil cap and replace OEM oil cap and clean side line for dealer visits.
As little drilling as possible- mainly i didn't want to drill the rear turbo charge pipe. I was ok doing the airbox but still made efforts to make that discreet and retain an OEM look when i remove the barb fitting and have the factory clean side fittings on to take it in for warranty work.
Find a convenient drain location and easy to use(as in i can drain it without raising the car) valve that wasn't bulky or heavy. I didn't want to use the big heavy copper valves i had seen used before and the location didn't provide a lot of clearance for fittings/adapters etc. I was very happy with how the drain setup worked out.
1st location fitting- Found this existing bolt on the front bumper support. I had to ream out the bracket hole just a bit to get it to fully seat against the bumper stud and also had to drill a new hole in the RX bracket(above the sliding section) to get the can positioned just the way i wanted. Overall finding the location was pretty easy. This pic is before i drilled the additional hole for the can
Installed with 8mm nut
Ended up cutting a small triangular tab from the washer res. it was rubbing up on the can just a little.You can barely see the nub from it in this pic towards the top of the can
Next was figuring out the drain setup. I used this barbed drain fitting i got from an RV store in town. I was stoked to find this thing in town! it worked flawlessly.Just hoping it stays out of harms way whe i'm driving around in a foot of snow.
On to drilling the airbox for CSS hose.I used a 3/8" barb fitting with 3/8" grommet instead of threaded fitting provided in the kit. Just looked a little cleaner than a threaded/barb fitting
Can't see it from the top when installed without the barb
Then just routing the lines from can according to the diagram.
From OEM ports down to can
And single hose for charge pipes over to driver side T fitting
T fitting under T stat housing. I will cap off the front fitting when i want to re-install the factory Clean side tube and oil cap.
and rear BOV connection up to T
Then front OEM fitting for 2nd vacuum source under boost
And link with more pics
http://s749.photobucket.com/user/04nutzer/slideshow/
That's all i got! After running around and getting all the parts and fittings the install really didn't take long. Happy my big assed b*tch is breathin a little better now!
")


")


