I'll try to look through my service manual tomorrow and find the headlight wire, but it might not be untill later. I never got past the testing phase but I wasn't to concerned about finding metal to mount it to. I think it only uses the resistor while the turn signal is high so it shouldn't really get that hot. If we had high parking light as our factory drl then it would be hot as a mother all the time >
You are using an out of date browser. It may not display this or other websites correctly.
You should upgrade or use an alternative browser.
You should upgrade or use an alternative browser.
2013 SHO Lamin-X Tints and LED conversion
- Thread starter BiGMaC
- Start date
BiGMaC said:DJE624 said:Great to hear it Tom! Did you end up pulling the cover?
I wimped out on the side-markers... :chair:
I did my side markers and they were a pain to reach no matter what I tried...I went at them from the fender liner and could just barely reach them...and you can't tell the LED's from the regular bulbs.... so if you are going to the work of changing, the switchbacks would be the way to go.
mjhpadi said:Those seats are great...I have a bench one with wheels from Adam's Polishes...but it doesn't come with the "Oh my God, you're fat" weight capacity rating....
After this weekend I'm having one then!
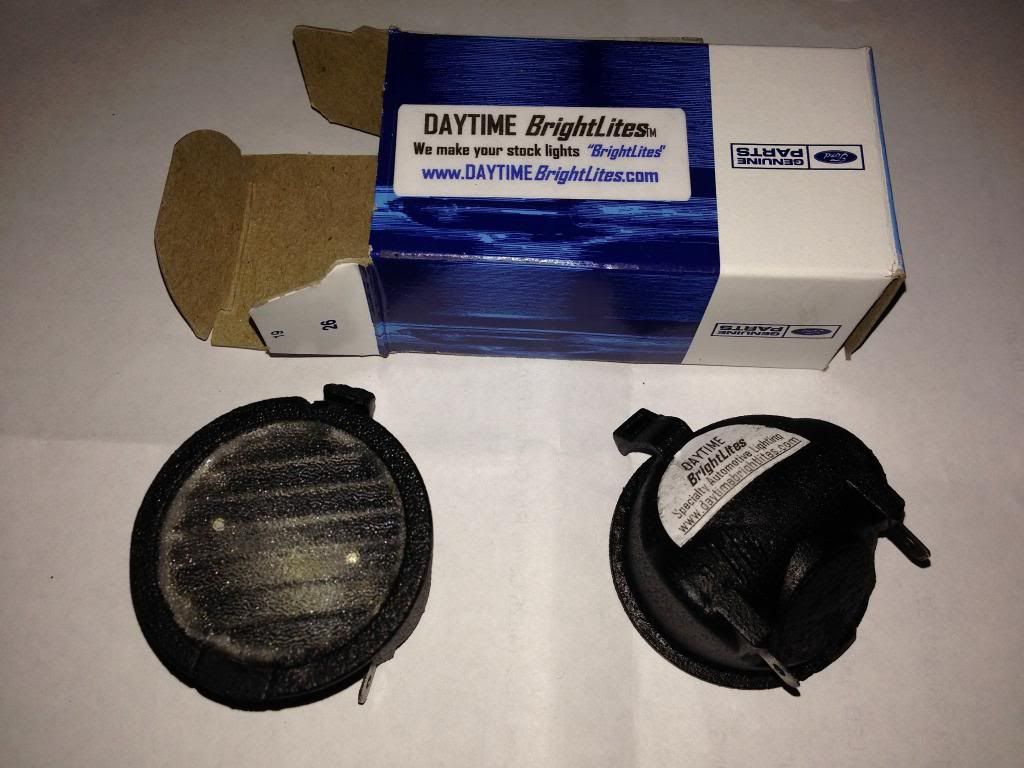
So ... Finally here are the pics on the vLED Triton switchbacks and install. ... But first... When I got home from the horse show today (the other kind of horsepower I participate in!) ... the mailman had left my LED puddle lights. They are Daytime Brightlites, and yes I paid too much, but I had christmas gift cards and they had an 800 lumen puddle lights at a sale price!...Also, I always assume my time is part of the cost and i'd rather drive than solder. The vLED Triton switchbacks you'll see later are 600 lumen. And yes, I can be lazy at times. I won't bore you with the puddle light install... The company put up a video and it's easy. One word of caution, work gently with the plastic retainer clip or you'll break it. Instructions also come in the pack. Basically pop out and pop in, and the less force the quicker it goes... took <5 min with pics.
Here's the pics of them and the before/after pics. Labels are above each pic... all camera settings (my phone) are the same... and it doesn't do well in the dark, LOL. They are much brighter than OEm. Compare to the LED interior lights as well.
First a pic of what came in the box (also got instructions)
Now a pic of the stock puddle light on the right side

Finally, the LEDs on in the left side puddle light
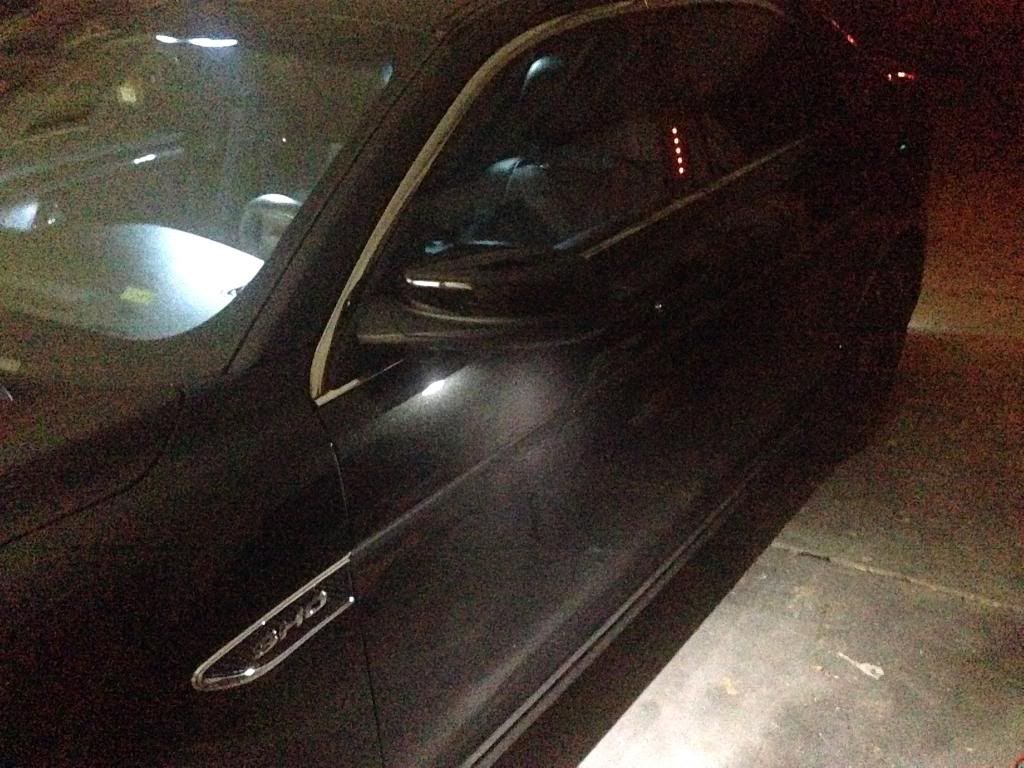
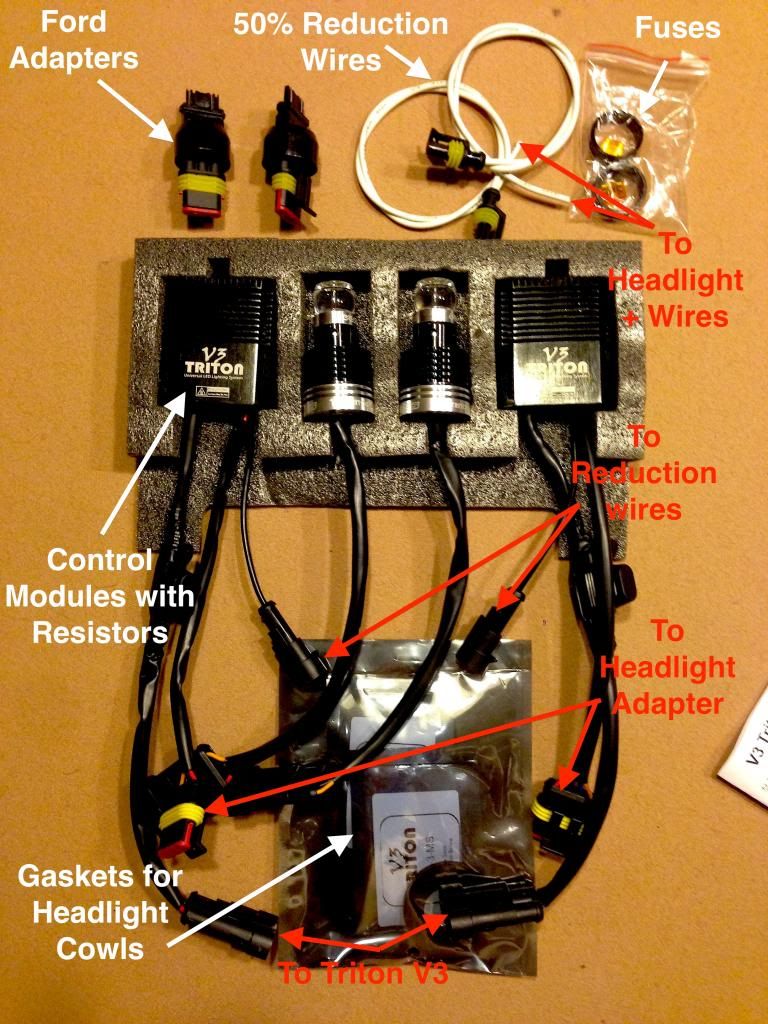
On to the Switchbacks! (Once again, pardon the dirty car, I live on a unpaved road and haven't washed in a week.) They are vLED Triton V3's with a color temp of 5K on the white part (they offer 6K if you want the blue look). The white is 600 lumen (on a meter, not just adding the numbers for the individual chips which is an incorrect measure). The pic of what came in the package with connections labeled is posted earlier. They worked first time and the instructions are easy and intuitive, except..
I'm still hunting for the headlight + wire to try the 50% reduction option when headlights are on.... any help here would be appreciated!
The company warns about heat from the control module which is about 1/3 heat radiation fins and recommends mounting to metal... I never realized how much plastic there is in our crowded SHO engine compartments.
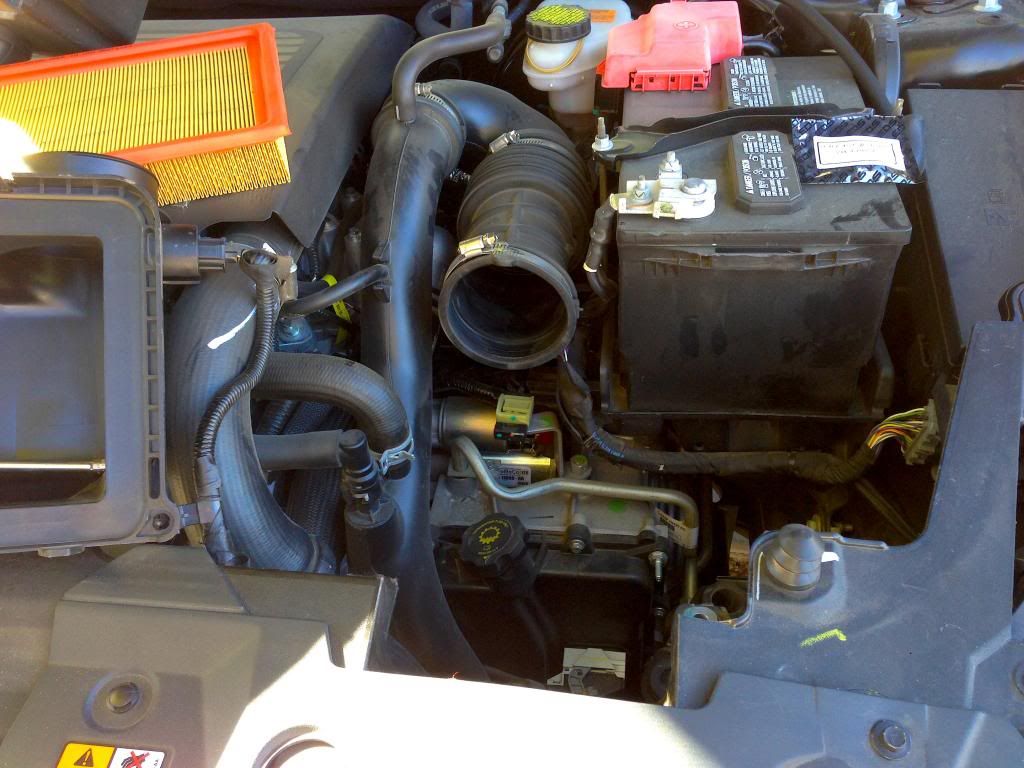
On the left side I removed the air intake... familiar to those with a CAI. I could see the park/run/blinker but couldn't reach it with the air intake in place... so out it came.
The air induction removed and set to the side in this pic
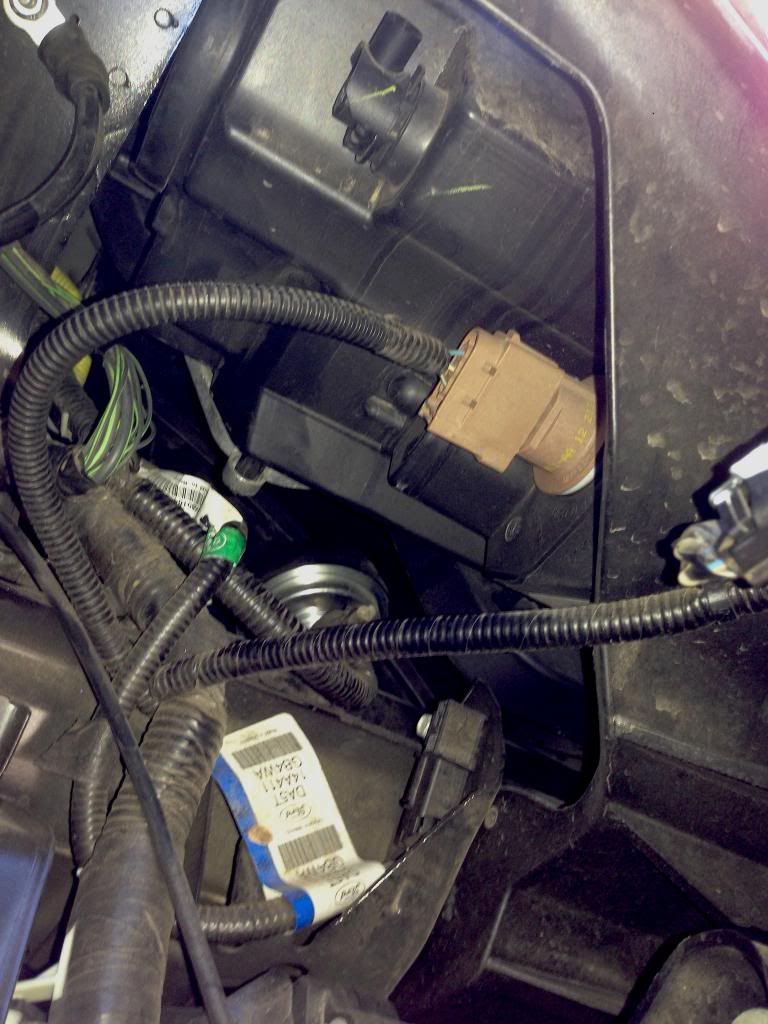
Lean over a little and look toward the left front tire. You'll see the tan bulb socket just medial to the HID housing. BTW, all Ford lighting sockets unscrew counter clockwise (as you face it from the side you'd grab to rotate it)
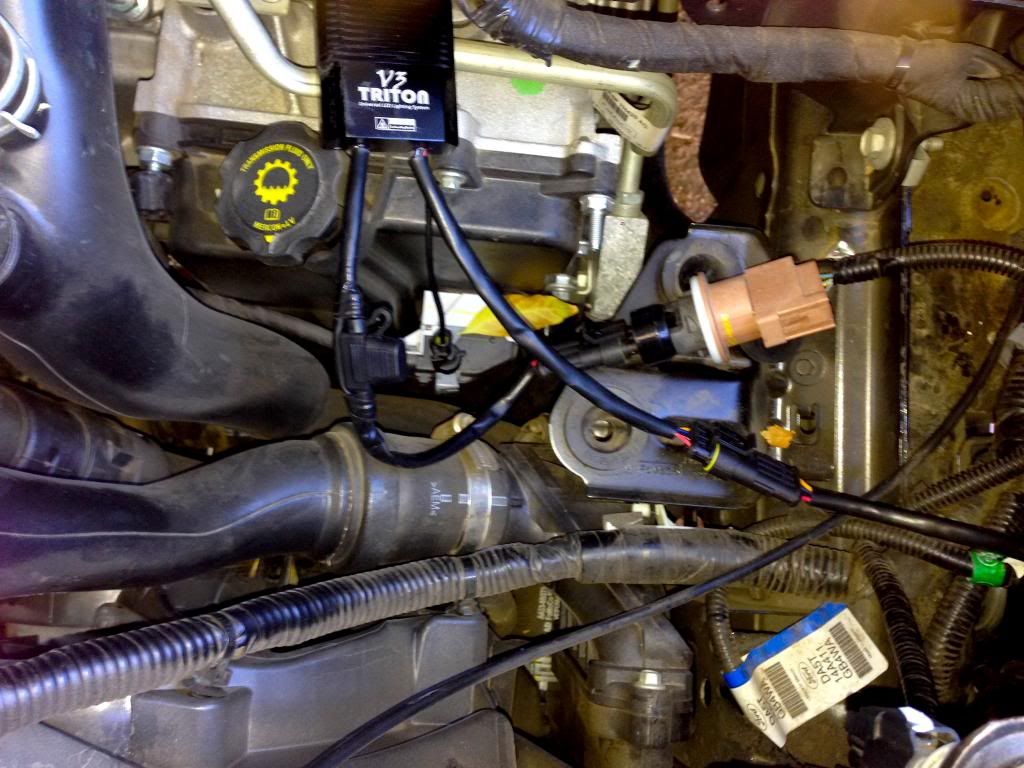
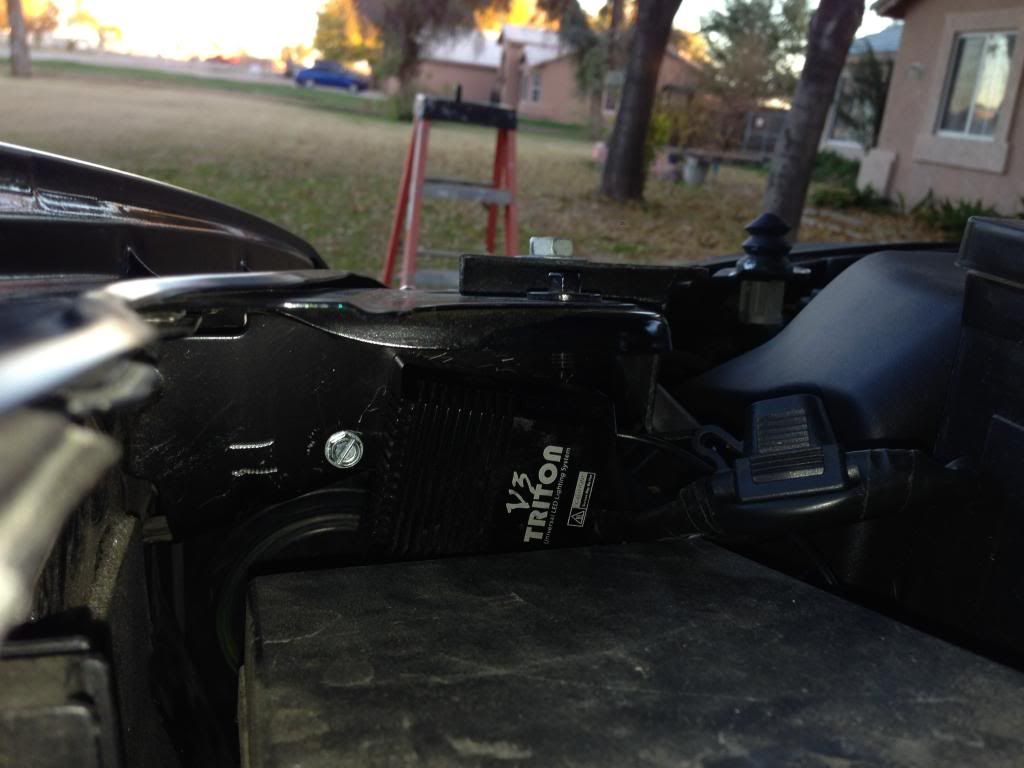
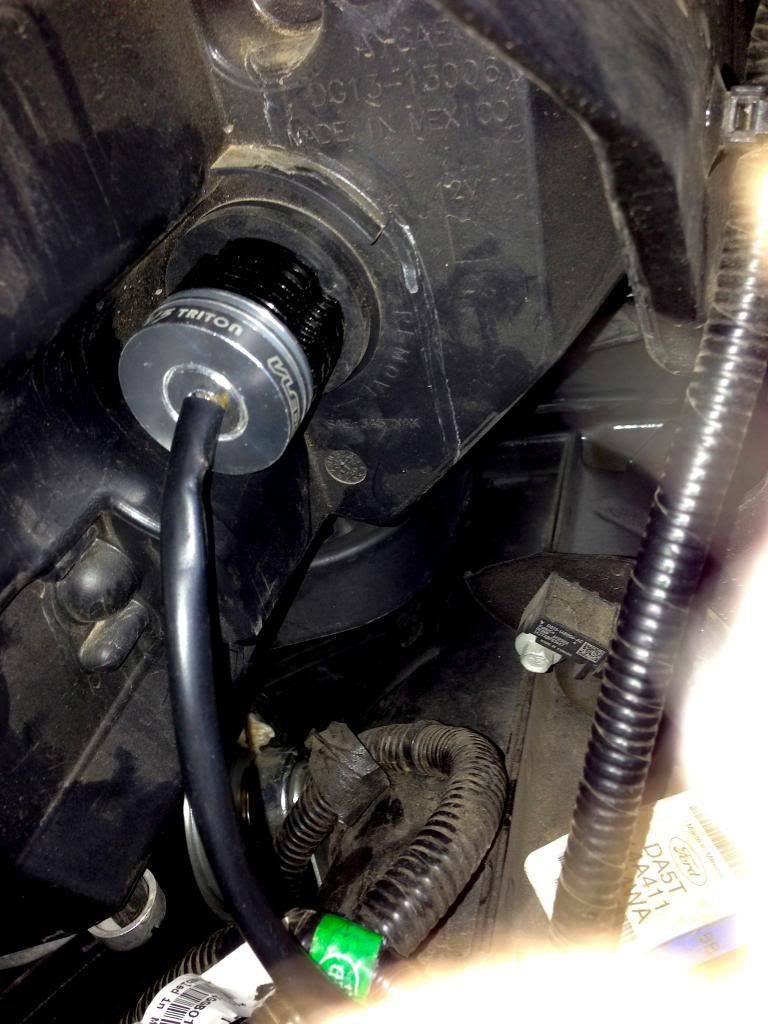
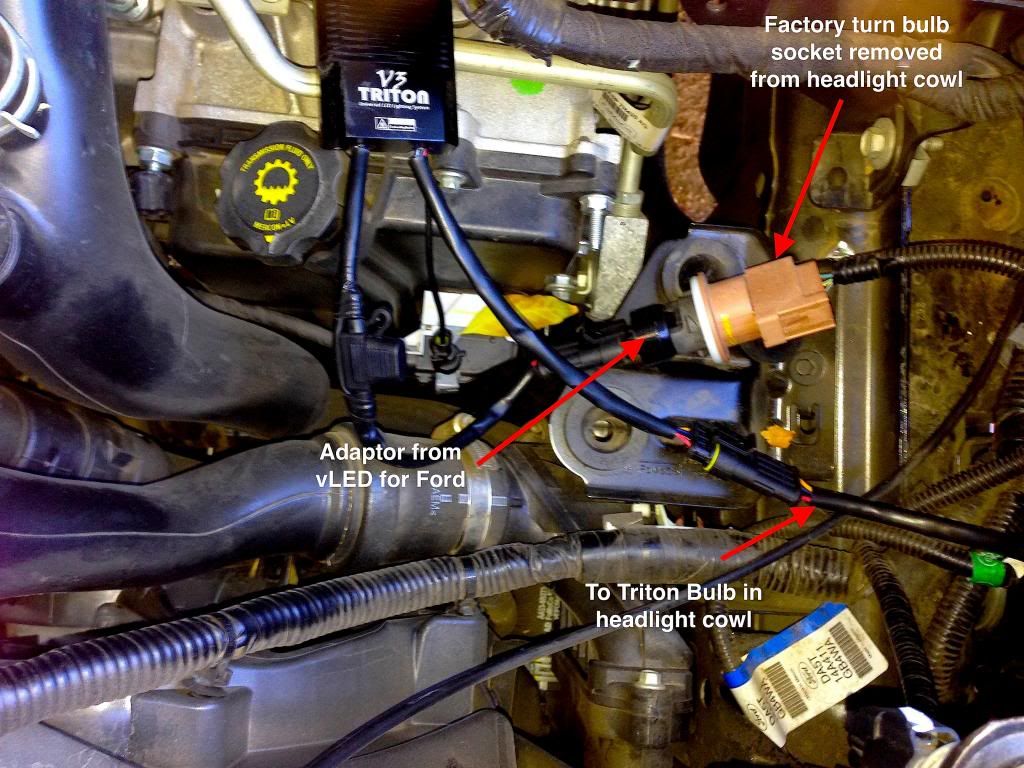
Here are three pics.... The first one shows the Triton system assembled and plugged in to the OEM socket (which I secured and protected with electrical tape) lying on the air filter support... The next one shows where I mounted the control module on a body panel support out of site and zip tied all the wiring (the only hole i drilled)...and the third is the Triton bulb and socket in the headlight cowl OEM opening
On the right side the window washer fluid container neck was flexible enough that I didn't have to do any R&R to install the Tritons. I cut away a 3"x4" area of a sound deadening sheet and mounted the control module on the wheel well using an OEM electrical ground screw that was there. Sorry.. no pics, couldn't get the camera to focus through the foreground things. The Below are a series of comparison pics with only the left system install. Be careful not to damage the washer fluid hose.
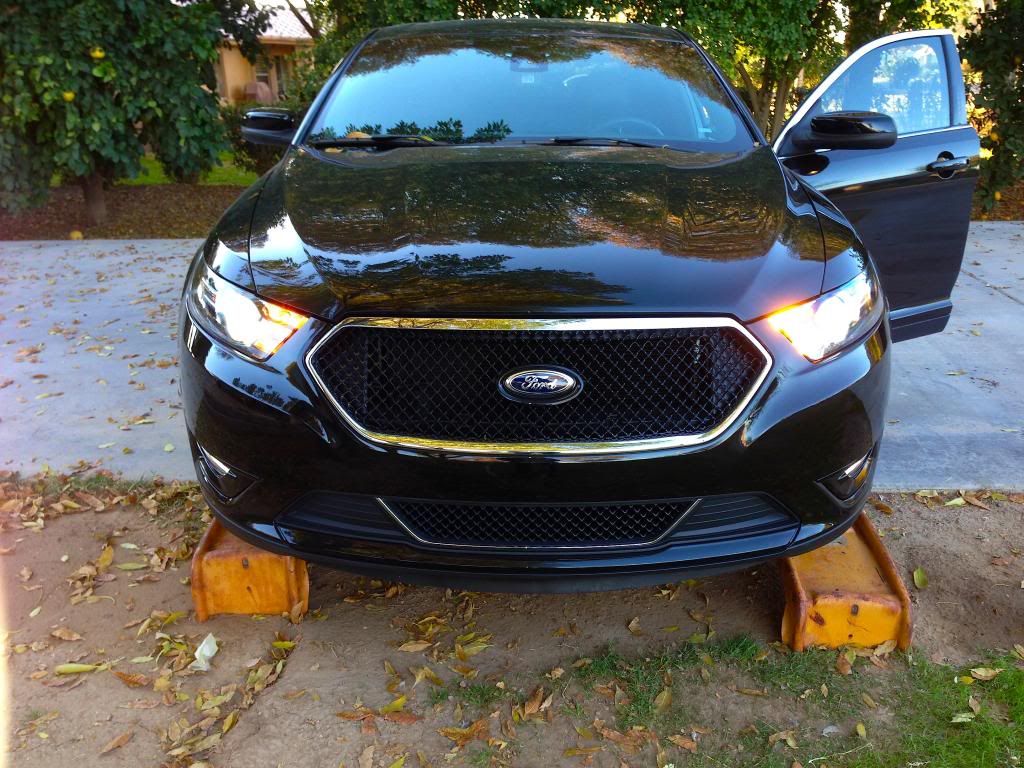
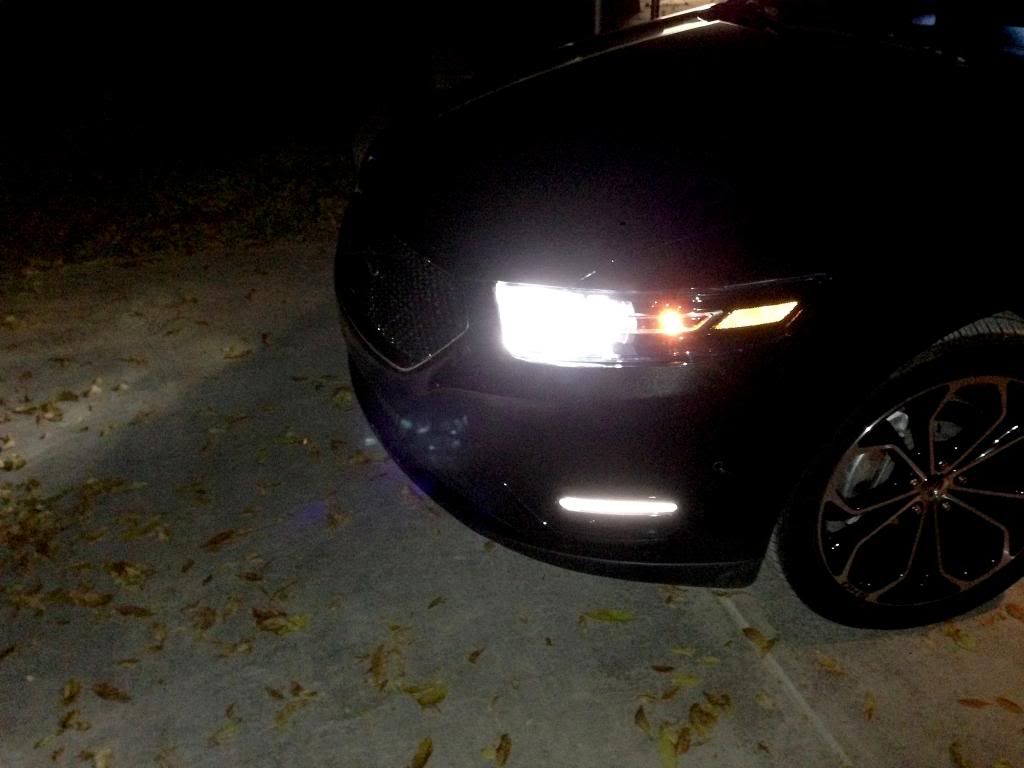
Below is a series of comparison pics done mostly during daylight that allow comparison of appearance/brightness/color with various functions... The white is a perfect match for the OEM HIDs and the amber is a little more yellow... but they told me it would be.. The white part is 600 lumens and the amber is 430 lumens. Labels are above the pics, and there is a video at the end also. These were all done with just the left side Triton system installed
Stock Right, Headlights off
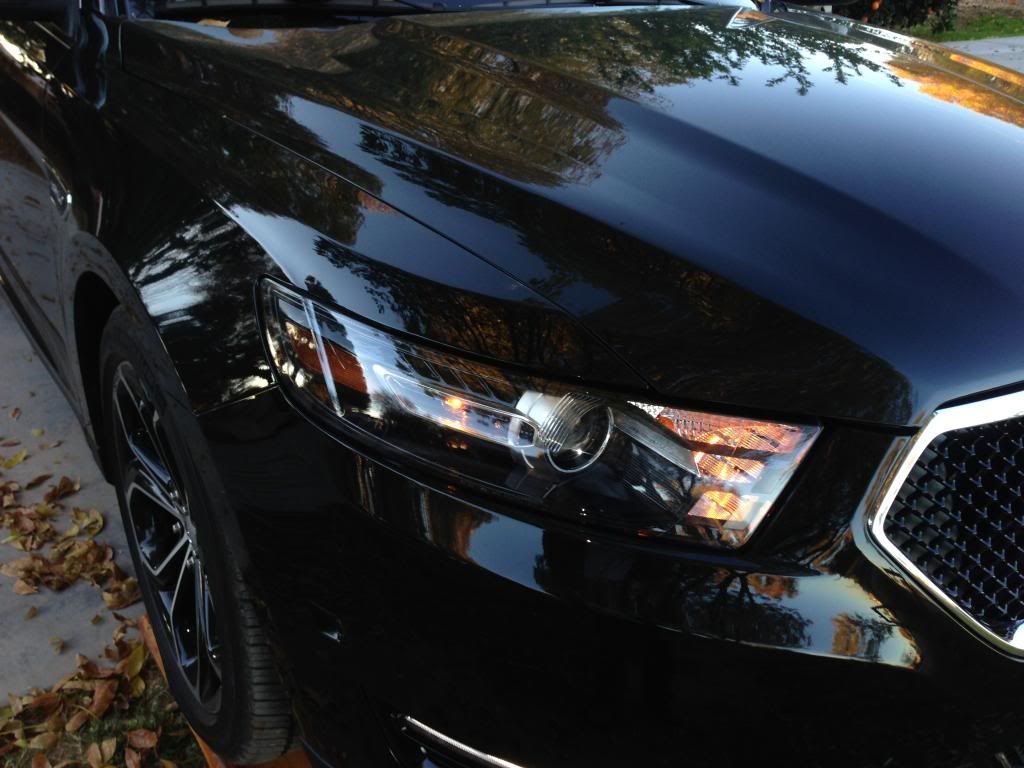
Triton Left, Headlights off

Both seen with Headlights off.. OEM passenger side, Triton Driver side (The car is on ramps because a I dropped a ratchet and had to open the under engine panel.)
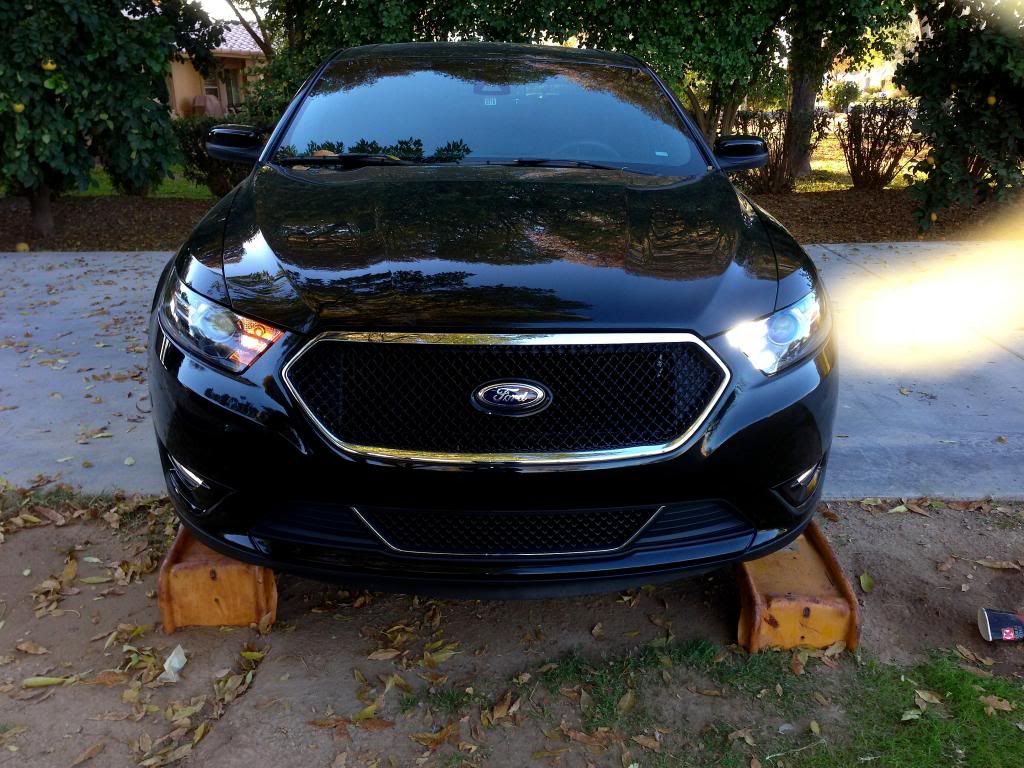
Headlights on (no blinkers)
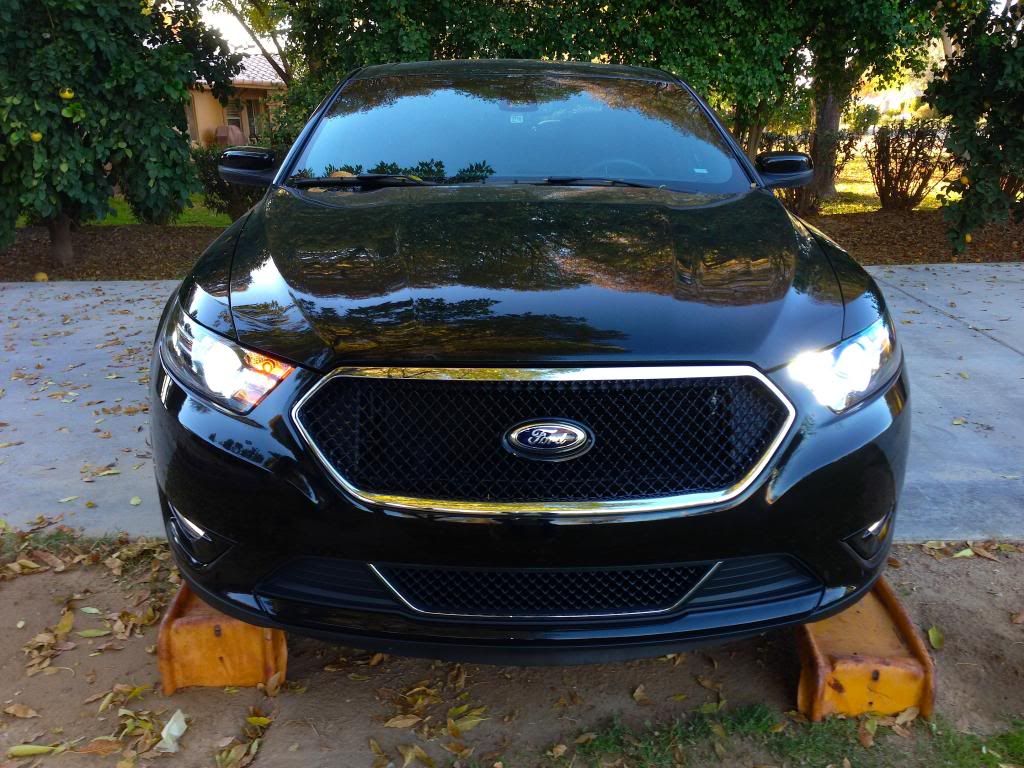
Headlights on with flashers
Left side in the dark shows a pretty good white color match with the "accessory parking lights" and HIDs at the 5K color temp
Here's a video demo with all combinations of the lighting functions shown. This was done with the left side Tritons installed and the right side remaining OEM so you can compare: It shows the color match, even yellow is fine, as well as the crisp action of the LEDs and their brightness.
http://youtu.be/1zex4WRtlbE
If you've read this far, Thanks for your interest! Any comments or questions welcomed!
As you noticed if you've been following, I still need to replace the side-markers with LEDs, but you can't even see them looking under the hood...they are behind large panels. I have to believe that Ford has a way without removing the entire front clip. I loaned my jack stands, but if I haven't found the trick for access soon, I'm going to put the SHO on jacks with front wheels off and remove the wheel well liners... I took a little peek and it might work to access the side-marker bulb sockets.
And yes......... I did install both sides!!
Thanks again.... the modding continues.... spent a lot of time between classes at the horse show texting with Brandon as performance oriented mods start in Jan with a baseline stock dyno this Friday...... with more, like subs and DSP, to follow. I have a terminal case of mod bug infection!
Here's the pics of them and the before/after pics. Labels are above each pic... all camera settings (my phone) are the same... and it doesn't do well in the dark, LOL. They are much brighter than OEm. Compare to the LED interior lights as well.
First a pic of what came in the box (also got instructions)

Now a pic of the stock puddle light on the right side

Finally, the LEDs on in the left side puddle light

On to the Switchbacks! (Once again, pardon the dirty car, I live on a unpaved road and haven't washed in a week.) They are vLED Triton V3's with a color temp of 5K on the white part (they offer 6K if you want the blue look). The white is 600 lumen (on a meter, not just adding the numbers for the individual chips which is an incorrect measure). The pic of what came in the package with connections labeled is posted earlier. They worked first time and the instructions are easy and intuitive, except..
I'm still hunting for the headlight + wire to try the 50% reduction option when headlights are on.... any help here would be appreciated!
The company warns about heat from the control module which is about 1/3 heat radiation fins and recommends mounting to metal... I never realized how much plastic there is in our crowded SHO engine compartments.
On the left side I removed the air intake... familiar to those with a CAI. I could see the park/run/blinker but couldn't reach it with the air intake in place... so out it came.
The air induction removed and set to the side in this pic

Lean over a little and look toward the left front tire. You'll see the tan bulb socket just medial to the HID housing. BTW, all Ford lighting sockets unscrew counter clockwise (as you face it from the side you'd grab to rotate it)

Here are three pics.... The first one shows the Triton system assembled and plugged in to the OEM socket (which I secured and protected with electrical tape) lying on the air filter support... The next one shows where I mounted the control module on a body panel support out of site and zip tied all the wiring (the only hole i drilled)...and the third is the Triton bulb and socket in the headlight cowl OEM opening


On the right side the window washer fluid container neck was flexible enough that I didn't have to do any R&R to install the Tritons. I cut away a 3"x4" area of a sound deadening sheet and mounted the control module on the wheel well using an OEM electrical ground screw that was there. Sorry.. no pics, couldn't get the camera to focus through the foreground things. The Below are a series of comparison pics with only the left system install. Be careful not to damage the washer fluid hose.
Below is a series of comparison pics done mostly during daylight that allow comparison of appearance/brightness/color with various functions... The white is a perfect match for the OEM HIDs and the amber is a little more yellow... but they told me it would be.. The white part is 600 lumens and the amber is 430 lumens. Labels are above the pics, and there is a video at the end also. These were all done with just the left side Triton system installed
Stock Right, Headlights off

Triton Left, Headlights off

Both seen with Headlights off.. OEM passenger side, Triton Driver side (The car is on ramps because a I dropped a ratchet and had to open the under engine panel.)

Headlights on (no blinkers)

Headlights on with flashers

Left side in the dark shows a pretty good white color match with the "accessory parking lights" and HIDs at the 5K color temp

Here's a video demo with all combinations of the lighting functions shown. This was done with the left side Tritons installed and the right side remaining OEM so you can compare: It shows the color match, even yellow is fine, as well as the crisp action of the LEDs and their brightness.
http://youtu.be/1zex4WRtlbE
If you've read this far, Thanks for your interest! Any comments or questions welcomed!
As you noticed if you've been following, I still need to replace the side-markers with LEDs, but you can't even see them looking under the hood...they are behind large panels. I have to believe that Ford has a way without removing the entire front clip. I loaned my jack stands, but if I haven't found the trick for access soon, I'm going to put the SHO on jacks with front wheels off and remove the wheel well liners... I took a little peek and it might work to access the side-marker bulb sockets.
And yes......... I did install both sides!!
Thanks again.... the modding continues.... spent a lot of time between classes at the horse show texting with Brandon as performance oriented mods start in Jan with a baseline stock dyno this Friday...... with more, like subs and DSP, to follow. I have a terminal case of mod bug infection!
D
DJE624
Guest
Great job Tom! Thanks for the pics and video. That is a really cool set up. Good luck with the next project!
Looks awesome :thumb: ! Thanks for all the pics & video. BTW, I think you will be VERY happy with DTBL. Dan is a great guy, works very hard to deliver an excellent, consistent product. No worries.
Sidebar: how are you able to get these ramps to stay in place? I used to have some a long time ago, and they would slide like crazy on concrete, making the process a bit nervewracking
Sidebar: how are you able to get these ramps to stay in place? I used to have some a long time ago, and they would slide like crazy on concrete, making the process a bit nervewracking
SHOdded said:Sidebar: how are you able to get these ramps to stay in place? I used to have some a long time ago, and they would slide like crazy on concrete, making the process a bit nervewracking
In the pics you notice that the ramps are in the soil, not on the driveway. They are so tall and steep that they would have crushed the lower flexible front fascia/"air dam" if I had tried to drive up on them. :nono:
Our yard is literally flood irrigated (all the property owners here are owners of the SanTan Irrigation District) so the ground slopes down from the drive to hold the 6" of water we cover the yard with every two weeks. It's how we get all the big trees to grow in the desert :yeah: ...
There's like a 12" berm with the drive on the high end. I drove the ramps about 3-4" into the ground to lower the high end... They weren't going anywhere! :icon_wink:
TouchOfEvil
New member
Looks good and i really like how the tails came out with the tint film on them.
dalum said:I emailed vled and they were happy to send me the new Ford socket adapters free of charge. Thanks for letting me know they were available. I haven't forgot about finding the light wire yet I just haven't had time. I'll get to it as soon as I can.
Glad vLED accommodated. For the price they should!
No Problem on the + headlight wire... when you can i'd really appreciate it, thanks.
They are focusable. I'm going to play with that. I screwed them all the way back (widest light spread) to reduce the amount of light hitting the reflectors in the headlight cowl since it retracts the lens system. I can see a lot better to the side and on the road surface with this and I haven't been flashed yet or lit up high on the back of a car.. but they are pretty bright still and I don't know how they'll be in fog... WAY over stock, about 6-8x
There is only one wire (each) that switches and its from the BCM under the steering column to the left HID box then over to the right HID box.
left side - BN-BU wire BCM c2280e pin 2 to headlamp assembly left c1021a pin 1.
right side - BU-GN wire BCM c2280e pin1 to headlamp assembly right c1041a pin 1.
c1021a and c1041a look to be directly behind the side marker lamp so taking the front bumper off and removing the light seems to be the best access to it. The passanger one is inside a bundle crossing the front of the car but I doubt that it's any easier to get to.
I'm pretty sure its +12 control when light is on but slight chance ground when light is on. There is a Red wire on pin2 that is Hot at all times that applies the high current to the ballast. The headlamp assembly is shown to be its own component and isn't clear whats going on inside.
Manual states "When the BCM receives a message requesting the headlamps on, it supplies voltage to the headlamp bulbs (halogen headlamps) or the ballasts ( HID headlamps) within each headlamp assembly."
Our "highbeam" wire just moves the actuator so the previously mentioned wire should be +12 the entire time headlamps are on. It would be neat to use the high beam control wire with a relay to break the white wire going to the leds so when highs were on leds would go high too.
Thanks dalum.... :beer2: so far so good, but i'll take a look at the car with your diagrams.
Seems I should be able to wire both to a single headlight wire since it's just a relay in the control module.
Doing the high/low thing might be possible using the shutter wires... I'll have to think about it and get my tester out.
Seems I should be able to wire both to a single headlight wire since it's just a relay in the control module.
Doing the high/low thing might be possible using the shutter wires... I'll have to think about it and get my tester out.
After a week with the vLED running light undimmed no one has flashed me... including 1 Gilbert PD, 2 AZ DPS, ans 1 Maricopa Co. SO........ For now I'l stay with what i've got there. I did order a 32" x 24" sheet of the Lamin-x Charcoal film. My neighbors business is wrapping cars.... when my lamin-X starts turning loose, or in the warmer months.... I spoke with him and he's gonna do a professional job after I smooth all the DOT lettering off. He promises NO bubbles. I'm a DA... should have had him do it to start!
D
DJE624
Guest
It will look a lot better without the lettering on there. I had some on my reflectors but it was up in the corner and they are recessed so you can't even see them unless you bend down and look really close.
I always used a 4/1 mixture, 4 coats clear to one coat base black.BiGMaC said:Have considered having the tails painted..... but I need to speak to 4DR's paint and body guy to see if the tuxedo black will work.
Darkside said:I always used a 4/1 mixture, 4 coats clear to one coat base black.BiGMaC said:Have considered having the tails painted..... but I need to speak to 4DR's paint and body guy to see if the tuxedo black will work.
Sounds right. But the tux black is 2 stage before clear... and what I'd like is some of the metalflake in it without having too many shadows with the tails on... ideas?
abnjeffy said:I just got my triton's but didn't know anything about a special ford connector or whatever. mine is a 2013 Taurus, do I need this connector from VLEDs?
Yea, The pic below shows what you need with labels. In the upper left are the adapters which you need. Kbeck and dalum had the same issue, but just called the vLED company and they sent them the adapters... They go between the control module and the socket on the factory wiring... They plug in where the parking/turn signal bulb is plugged in and the entire rest of the Triton system plugs into the factory harness through the adapter. Be sure to secure it with electrical tape after you plug it all in.
BTW, I just screwed the Triton bulbs all the way in (they are focusable) and didn't use the 50% reduction wires... love it, brightest that way, simplest install, and no problems with police or other cars flashing me ever... your choice.
SEE BELOW, Left click the images to enlarge:
Hope this helps
Similar threads
- Replies
- 65
- Views
- 28K
- Replies
- 2
- Views
- 6K
- Replies
- 10
- Views
- 11K